7 Best
Peachtree Woodworking Woodworking Tools
-
 Product Highlights
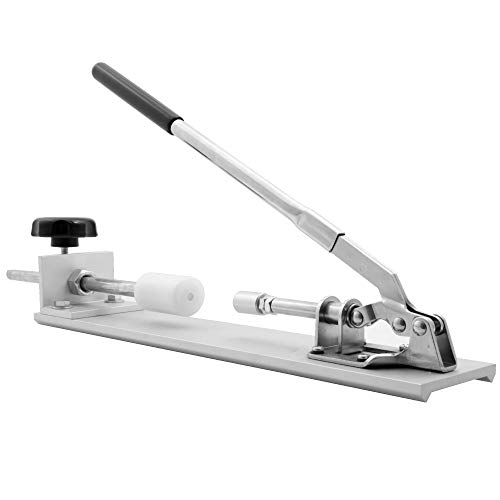
- The jaws on the drilling center move in and out simultaneously to insure precision center drilling of your blanks each and every time you use the vise.
- Holds blanks up to 1 1/2 " square. the pen center vise includes a scrap board piece of mdf. it measures approximately 2 " by 1/4 ".
- Easily locate and drill pen blank centers and drill through the exact center of your pen blanks with this simple but effective pen centering vise. by far one of the best selling pen vises available, this jig will be a go to tool when turning your pens.
- Just set up the vise once and drill all of your blanks in the exact center. there is no need to change the setup regardless of the blanks size or shape.
- International products have separate terms, are sold from abroad and may differ from local products, including fit, age ratings, and language of product, labeling or instructions.
SHOWview product -
Product Highlights
- Another great reason to use a zero clearance insert is to help reduce that pesky and irritating tear out you always tend to get on your cuts. without a zero clearance, the wood has no support by the blade to prevent the wood from tearing out. this is especially true when cutting plywood. zero clearance inserts help prevent tear out by essentially enveloping the blade on...
- This zero clearance insert is made from a high density phenolic material that was chosen for its ability to stand up to everyday workshop use. the insert features two snug fit sand-able side tabs that allow you to remove a little material at a time for a perfect fit if necessary. the insert also features a top and a side snug fit screw for a tight fit to you saw with no...
- If you own a table saw, then you probably have had smaller pieces of wood get caught between the saw blade and the factory supplied throat plate opening. this can cause that piece of wood to jam up against the blade and go flying across the room or worse yet, right back at you. zero clearances help minimize this situation from happening since there is no gap between the...
- Zero clearance inserts can be used in conjunction with most any table saw blade including thin kerf, standard kerf and carbide tipped blades. you can also use zero clearance inserts with dado blade sets. the reason you would use zero clearance inserts with dado blades is to reduce the amount of tear out the dado blade set produces. we recommend that you use separate zer...
- Measure your factory insert and compare size before you order. zero clearance inserts are table saw specific. since every table saw brand and manufacturer is different, we recommend that you measure the exact length, width and thickness of your table saw insert or opening and compare it to the size we list. also be aware of the shape of your current insert of whether it...
SHOWview product -
Product Highlights
- Typically there are 4 basic grind types (3 types of bowl gouges and 1 type for spindle gouges). the 4 basic grind types are standard, short and long for bowl gouges and fingernail grind for spindle gouges. these grinds are all simple to achieve using the multi-grind jig and we show you how to do them in the included instructions
- Once your setup, the multi-grind jig with your tool mounted makes grinding the round shape of bowl gouge very easy and very smooth when compared to free hand grinding. the natural pivoting, rolling action in provides allows you to not achieve the perfect grind, but keeps your fingers away from the wheel at the same time.
- One of the more challenging angles or grinds to achieve on our turning tools is getting the grind correct on a bowl gouge or spindle gouge. we have developed the multi-grind jig with setup blocks to eliminate the guess work so you can focus on making the perfect bowl gouge or spindle gouge grind every time! using this jig with any system that has a pocket v-arm attachme...
- With this jig and included setup blocks, you’ll be able to quickly and accurately set your tool grind projection, the correct tool angle (depending on desired grind you choose) and the proper pocket v-arm depth. having these three variables simplified makes your setup process so much easier!
- The multi-grind is made from high quality steel. the knob is made from brass and the threads provide a smooth rotating action when the brass knob is turned. the clamp pad is covered with a non-marring pvc material to help protect your tool while grinding. the clamp opening has a v-shape base that accepts your turning tool perfectly and won’t allow your tool to accidenta...
SHOWview product -
Product Highlights
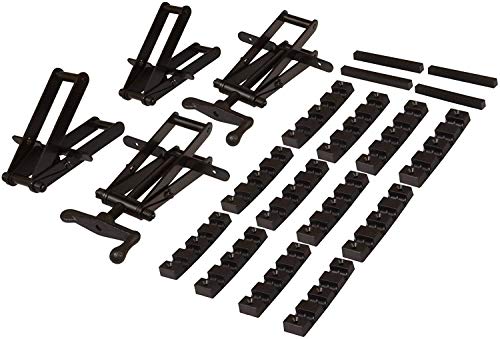
- Let’s make racked panel glue ups a thing of the past. with a simple turn of the rotating clamp handle, all four sides of the clamp will draw inward at the same time
- Now you can confidently glue up wide boards, shelving, table tops, and more up to 6” thick. to setup the clamps simply attach the clamp to any length 2 x 2’s (2” x 4” ripped in half) with the the wood screws that are provided, apply wood glue to your project, set the clamps on to your panel boards and turn handle to tighten the clamp on all four sides. we recommend that...
- Clamping panels can certainly be a challenge. especially when we try to use everyday pipe clamps or bar clamps. while these types of clamps work fairly well on certain glue up projects, the one thing they don’t do at all is apply pressure from the top and bottom of the panels during glue up. in fact, with all the pressure being applied on both sides, bar and pipe clamps...
- Build any length clamp with the durable plastic bars with 4 notches for maximum adjustability to handle a variety of stock widths. clamp can be used for boards up to 6 inches in thickness by simply adjusting the clamp width capacity with the appropriate number of notches. turn the handle clockwise to tighten the clamp and turn the handle counter clockwise to release pre...
SHOWview product -
Product Highlights
- Features: length adjustable, roller sliding tenon. upgrade lengthen size meets different machine needs.
- Metric & imperial: scales for both millimeter and inches are engraved on the anodized aluminum body to the same tolerance. metric engraving has 0-110mm, sliders make it adjustable to 167mm totally.
- High quality: quality aluminum alloy, fine workmanship, wear-resistant and practical, high accuracy and fine quality.
- Fit for: #30mm standard t-slot, 3/4", 3/8'' standard miter slots.
- Apply: equipped with sliders and t-slot bolts, fit 3/4 x 3/8 inch standard miter slots and 30mm t-slot track, can work with most standard table saw, router table and band saw.
SHOWview product -
Product Highlights
- The rougher or lower grits like 60 grit can be used for abrasive planing and dimensioning. the medium grits like 80, 100 and 120 are typically can be used for lighter dimensioning projects and general surface prep. when using 150 grits and 220 grits we recommend using those higher grits for finishing passes only.
- Straight feed? how about angling your stock feed through the drum instead. angling the stock offers many advantages like less loading due to glue lines, better and more even wear and reduced motor loads. just a slight angle provides you with more effective stock removal. keep in mind that to achieve the best finish, the last two passes on the material should always be w...
- Made from heavy duty cloth backing our abrasive rolls are the perfect economical ************************************************************* sandpaper rolls for your performax and jet 16-32 and other machinery that accepts 3” wide rolls. these high performance aluminum oxide rolls are designed for all purpose sanding. the grain is resin bonded and have non-loading pro...
- The right amount of pressure you exert on your boards is absolutely critical. too much and it will shorten the life of your abrasive roll, burn the material or cause problems with the motor on your machinery. to avoid too much pressure, with your machine turned off, place the material under the sanding drum, the raise or lower the drum so the drum contacts the material ...
- When sanding misshapen stock pieces you should always start sanding the piece with the crown side up. this helps prevent tipping or rocking when the piece is being fed through the sander. once the down is gone, flip the stock over and sand the other side. as always, take extreme care and caution when sanding boards that are bowed, twisted or otherwise imperfect.
SHOWview product


 Coupon copied


